Over the past year I’ve developed a periodic habit of going on keeb.io and just ordering up a kit for a keyboard just to try it out. Like with most mechanical keyboard supply shops, you have to keep a close eye on when things are in stock, but they have some fun and relatively simple keyboard kits.
I recently embarked on trying to find an answer to the question “what if I had a keyboard that was like the Planck, but had just a couple more keys on it?â€
There are a couple Planck-like keyboard projects out there that kind of fit the bill of what I was looking for, but I noticed the Iris kit on keeb.io and decided to give that a shot.
It’s a split ergonomic type keyboard with an ortholinear layout. Each half has 28 keys; a 6×4 grid, plus space for 3–4 thumb keys on the corners of each half.
Now, its default layout is set up not quite like a Planck; it’s actually using the top row as number keys, like this:
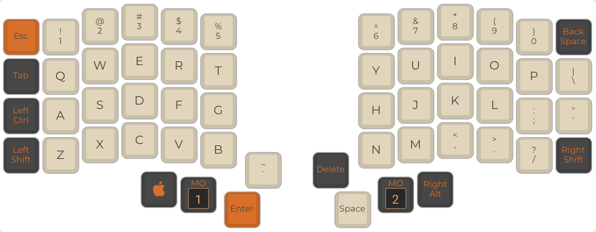
But this is a fully programmable keyboard, so I don’t need to concern myself with such limitations!
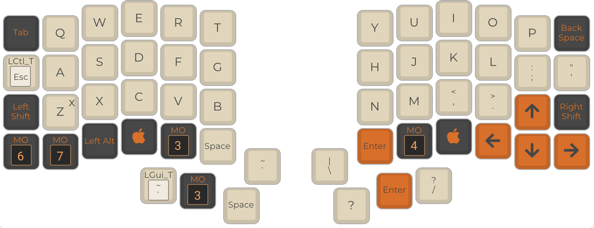
Instead, I decided to lay mine out as though it’s a Planck, just with some extra keys added:
Switches and Keycaps
Once you’ve picked what kind of keyboard you’re making, the next most important set of choices are going to be which switches you’re going to use, which will in turn inform which key caps you can use. The switches, if you’re not familiar, are the component that goes beneath each key cap, and it’s the “mechanical”part of a mechanical keyboard; it actually has mechanical components within it that are responsible for actuating when you press a key, and are also responsible for a good chunk of the clickiness you feel when you are typing on a mechanical keyboard.
The Iris PCB, luckily, is quite flexible! It supports three main types of switches: Cherry MX-style switches (by far the most commonly used in modern mechanical keyboards), ALPS switches (very popular in the 80s and 90s with some die hard fans still today), and Kailh Choc switches (a thinner switch that enables you to build a low-profile keyboard with less key travel and less thickness).
I initially decided to lay mine out with ALPS-style switches made by Matias. Because ALPS-style switches use a different plastic stem shape, that severely limited my key cap options, so I just bought a set of blank key caps from Matias.
Obstacles
Building the keyboard is pretty straightforward. The latest PCB is basically all pre-made; you just have to solder the switches in, then screw the case together. It’s a good beginner project, too, because there are only 56 contact points you have to solder on each half.
Once I had the keyboard together, and once I ported my layout over to it and flashed it, I gave it a whirl. But the thumb keys proved to be a problem; they were basically blocking the two keys they’re in front of.
So, I decided to try something experimental: what if I bought a few low-profile Choc switches, and used those for the thumb keys instead?
That’s got to work, right? The PCB supports both types of switch.
It was a little janky, and the PCB wasn’t built to have more than one variety of switch in it at once, but with a little flexing, I got the Choc switches (Jades, if you were wondering) soldered in and they worked!
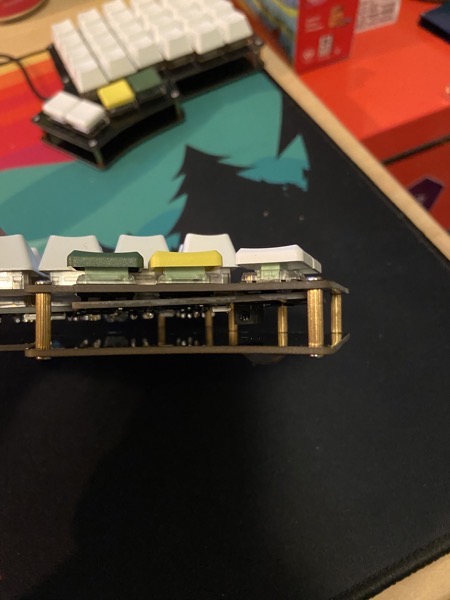
Show me the keyboard!
It came out looking pretty cool. Note that despite my stint living in Wisconsin, I’m not as much of a Packers fan as the key caps let on; the supplier I got the key caps from included some color key caps as freebies.
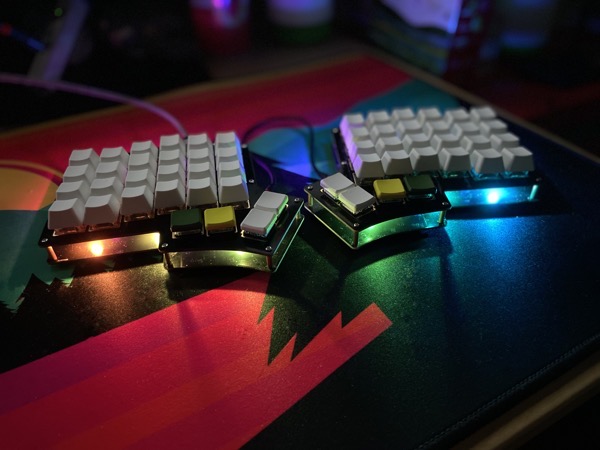
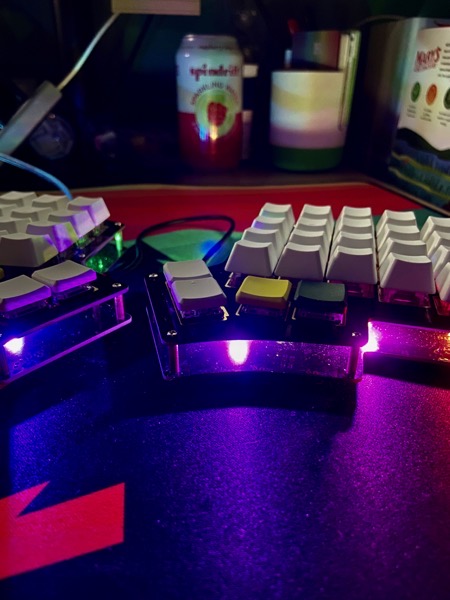
And of course, you’re probably wondering how it sounds. Well, I am delighted to say that the ALPS-style clicky switches are some of the clickiest you can get, and these are nothing short of really satisfying to listen to:
Mind you, with this particular choice of case and plate and keycaps, I am ending up with a somewhat different sound than these same switches produce on another keyboard. Let’s hear these ALPS switches on my Ergodox Infinity, for instance:
The difference is more pronounced in person, but the sound is deeper than on the Iris.
Also, the four thumb keys are using “thick click”Kailh switches, which also have a lovely little sound and feel to them:
I think if I could do it over again I’d have picked the slightly stiffer Navy Blue Choc switches.
Parting Thoughts
Whenever I’m using a Planck or similar 48-key keyboard, I’m always thinking to myself “if I just had a couple extra keys here that’d be just perfect.â€
And so I give myself a few extra keys with the Iris, and I realize it’s not the productivity boost I thought it’d be.
The issue: With the Planck, everything is within super easy reach. The thumb keys on the Iris are just far enough away that your fingers second guess themselves when you try to use them. That slows me down more than you might think. So even if this gives me some new dedicated keys I can now hit without a layer switch, it’s still actually just faster for me to hit the equivalent key on the Planck, even though hitting that same key involves two keystrokes.
I’ll give myself more time though. This keyboard is still a lot of fun to type on and I really do like how rich and clicky it sounds. Also, the switches are still a little stiff and would benefit from a little more time to break in as well as a bit of lubrication.
This is a great quarantining project too. Material costs are $100–150 depending on what components you pick out, and the soldering work is pretty easy. Hit me up if you have questions about it.


Leave a Reply